In order for WHMCS to be able to perform automated tasks such as invoicing and account suspension, you must first set up what’s known as a cron job.
This can be done in many common control panels such as cPanel, which is what we’ll be using for this tutorial and the following video tutorial, which you will find here
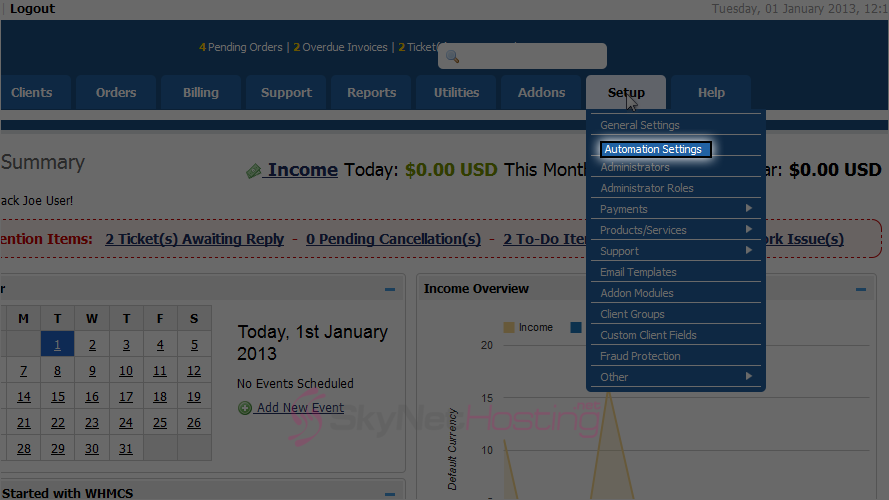
- Before going into cPanel, first log into WHMCS admin panel and click on Setup.
- Click Automation Settings.
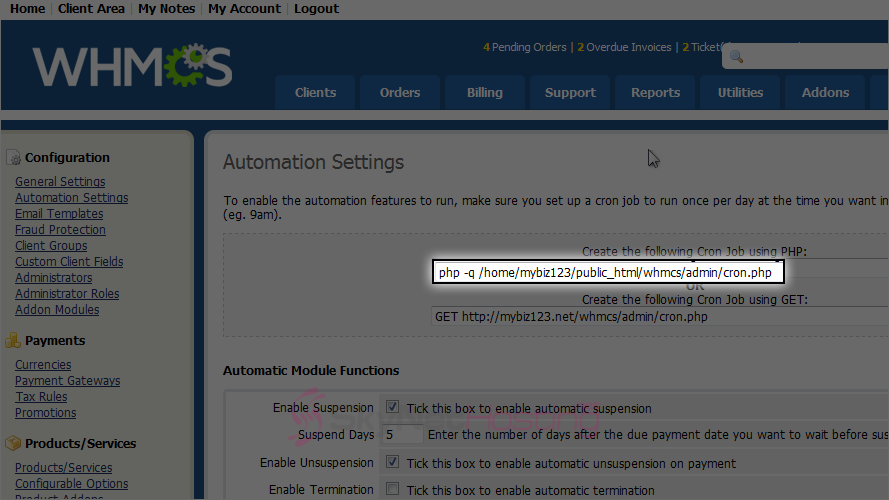
- WHMCS provides you with the command necessary to run the cron job using PHP. Copy the command.
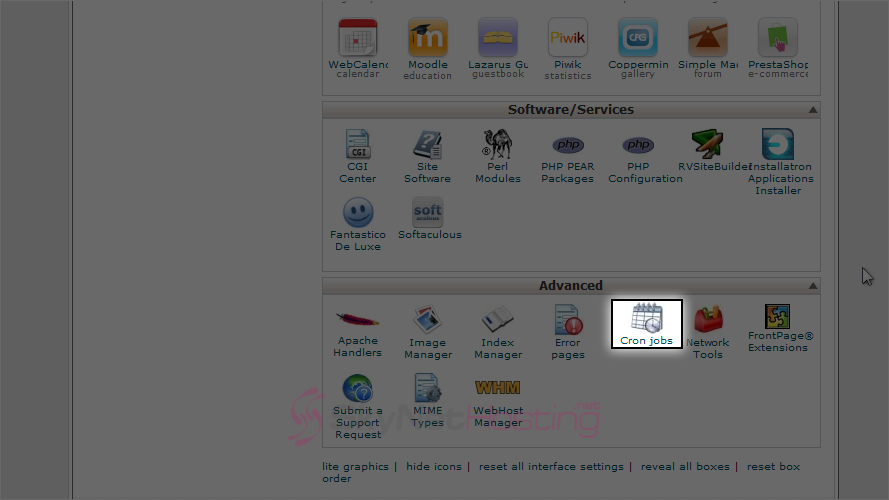
- Proceed to cPanel. Scroll down to find the Cron Jobs link and click on it.
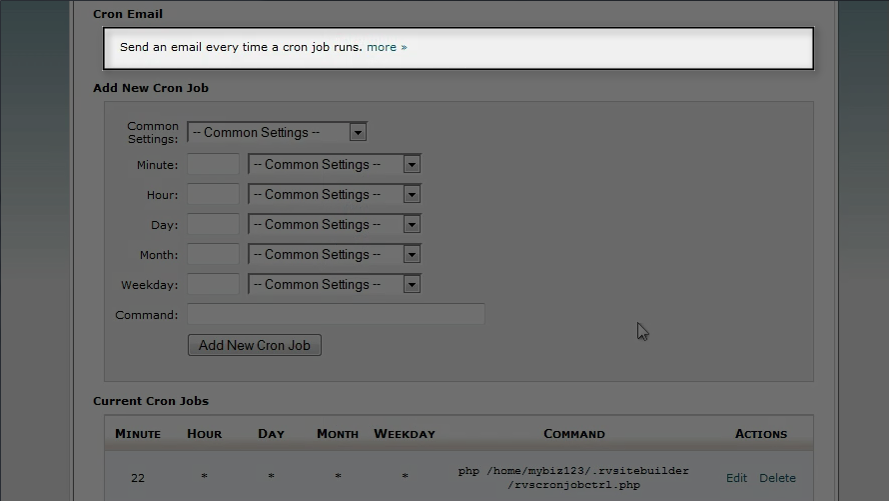
- Here, you can enter the e-mail address to which the cron job will send output, if any.
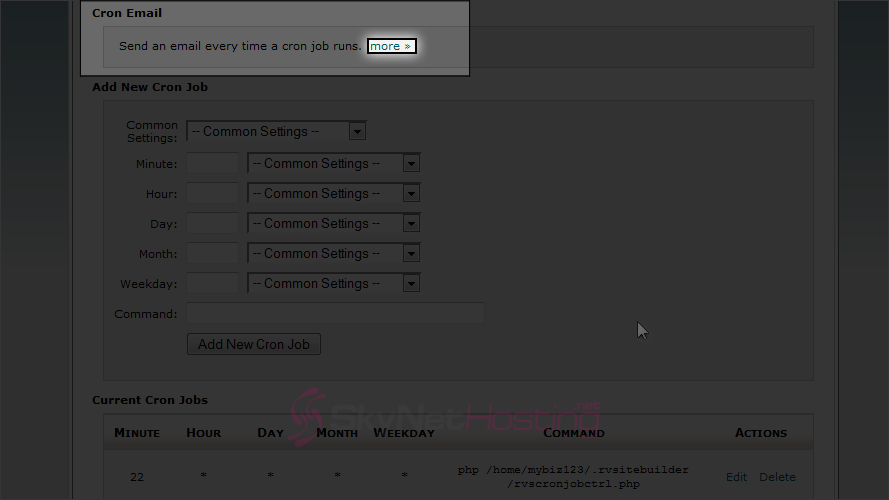
- Click more link to enter/modify email address.
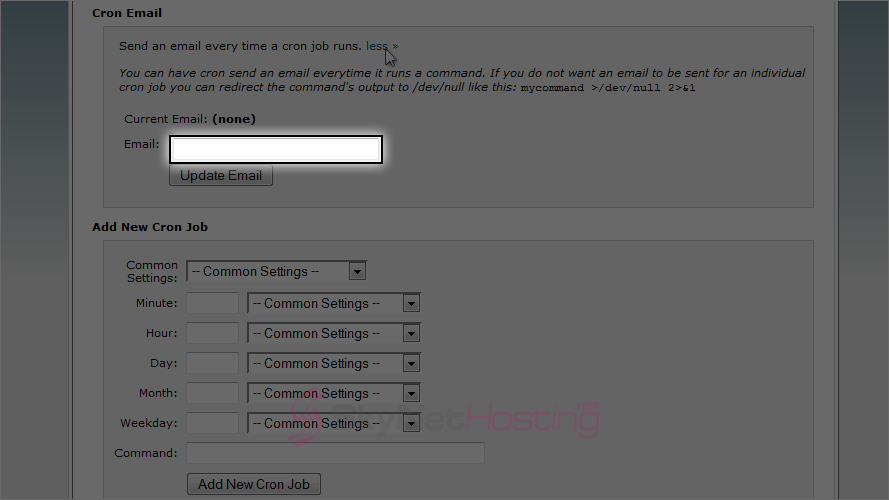
- There is no email set to receive notifications. Let’s set one.
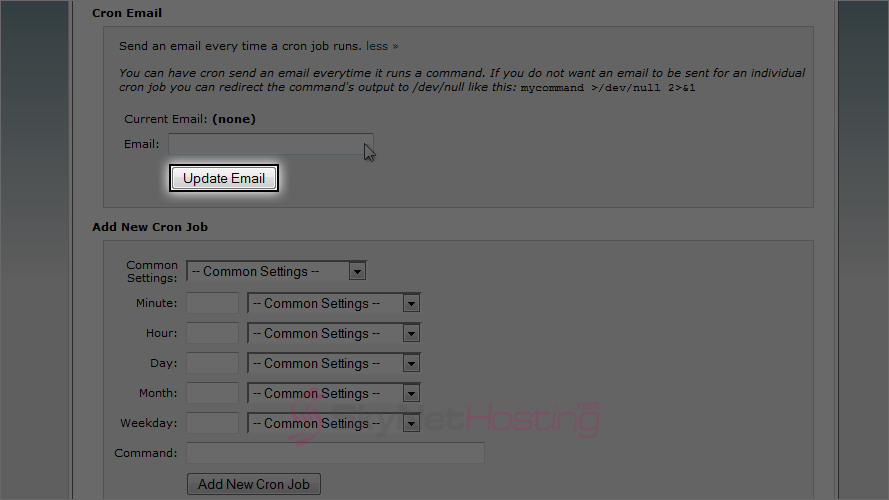
- Click Update Email.
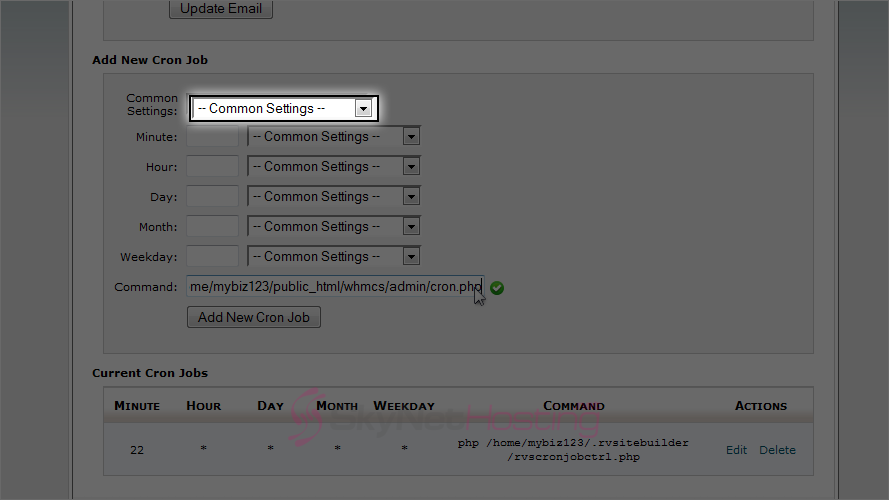
- Now let’s scroll down a little to setup the cron job. Paste the command here.

- You can set time yourself or can choose from drop down.
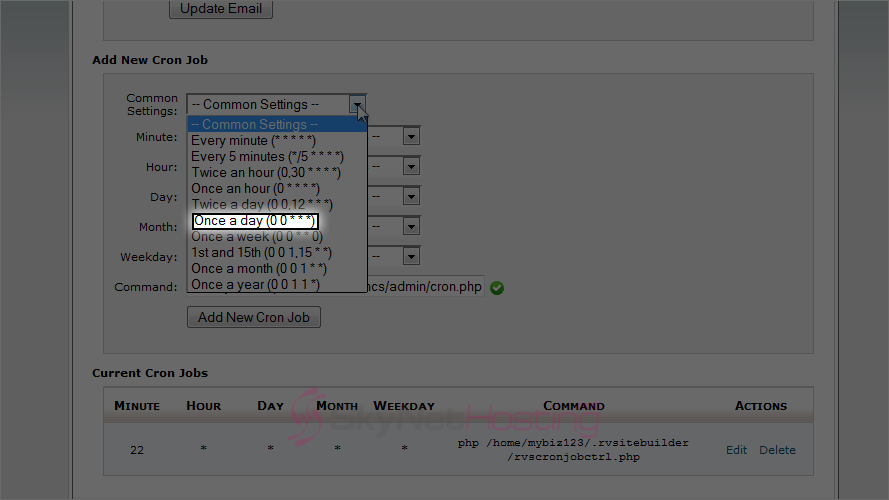
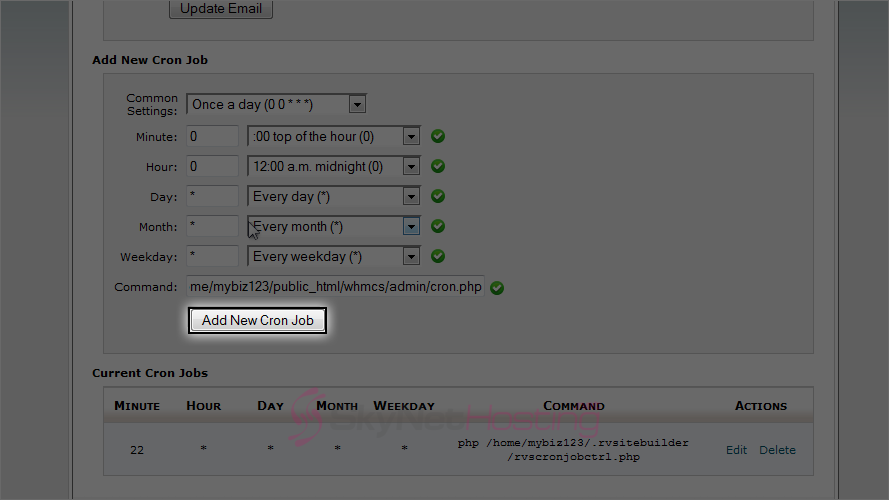
- In this case, for WHMCS we need to set cron job run daily, so select once a day.
- Click Add New Cron Job.
That’s it! You now know how to set up the WHMCS cron job in cPanel.